SPE1.1.0.2
WIPE MODULE MANAGEMENT
CONTENTS
CONTROL PANEL
The sanitization module control panel allows easy access to specialized functions for erasing (masking, encryption, destroying) the free space in logical drives.
Control of the remediation module is carried out using system buttons and control panels. Unlike other work modules, there is no system menu here. Nevertheless, the user can use keyboard shortcuts and drop-down menus if necessary.
The appearance of the control panel changes depending on the selected remediation mode. This mainly concerns the process control modules.

Fig.1. Sanitization module control panel.
The sanitization module control panel contains a set of general purpose function blocks, as follow:
The sanitization module control panel blocks
- Control panel
- Processes indicators
- Wipe mode selection control
- MFT sanitization control
- Working directory selection module
- Process information control module
- Execution processes control
- Emergency stop and clear the information
SYSTEM BUTTONS
The sanitization process control unit contains a set of special and general purpose function buttons.
The general-purpose buttons include functions for creating new directories, renaming directories, and permanently deleting selected directories.
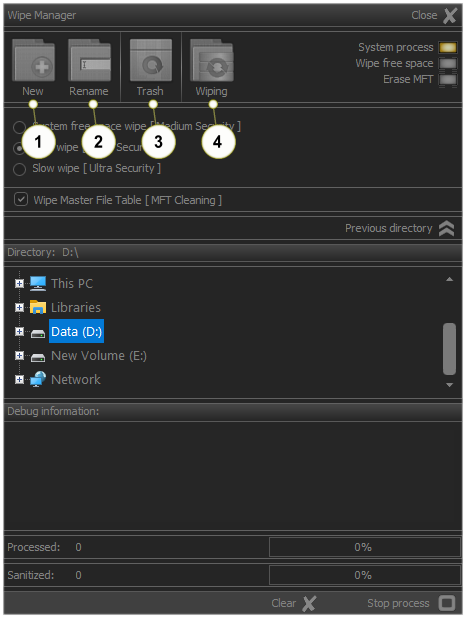
Fig.2. Control panel system buttons.
The sanitization module system buttons
- Create new folder
- Rename selected folder
- Wipe mode selection control
- Clear all custom settings and process information
- Starting wiping process
In addition to the aforementioned buttons, the control panel also has buttons for managing the remediation process, including and emergency termination if necessary.
Logical Drive Sanitization System Buttons
| Icon | Caption | Function | Shortcut |

|
New |
Create new folder |
Ctrl+N |

|
Rename | Rename selected folder | Ctrl+R |

|
Trash | Delete selected folder | Alt+Del |

|
Wiping | Start sanitization process | Ctrl+Del |
SANITIZE SELECTED LOGICAL DRIVES
The sanitization module control panel allows easy access to specialized functions for erasing (masking, encryption, destroying) the free space in logical drives.
The wiping module includes three standard modes of the sanitization (logical drive free space wiping) , as follows:
- System free space wipe - A method based on the built-in API functions of the operating system used.
- Fast wipe method - A standard solution, the functionality of which is in accordance with the requirements of NIST 800-88.
- Strong wipe method - A method that involves a series of actions where specialized random number generators are used in the process of overwriting the data.
In addition to the proposed sanitization methods, the possibility of masking Wipe Master File Table (MFT) is also provided. This function is recommended, since in practice it only affects the meta-information about the deleted files, and its execution requires an additional time resource.
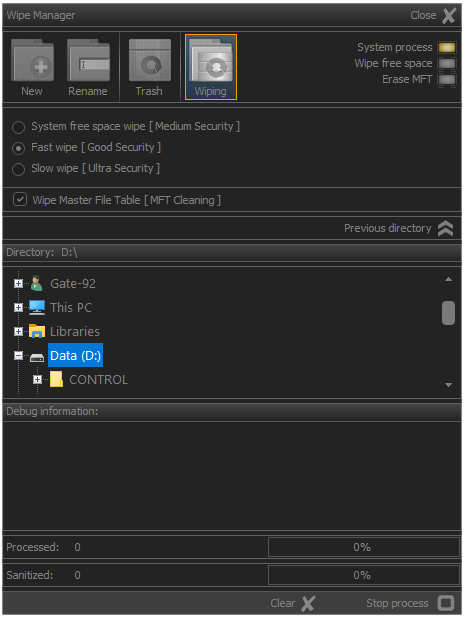
Fig.3. Wipe manager default settings.
To start the remediation process, you need to click on the Wiping button or use the Ctrl+Del keyboard shortcut.
Before starting the remediation process, the application will display a warning message and require confirmation from the user.
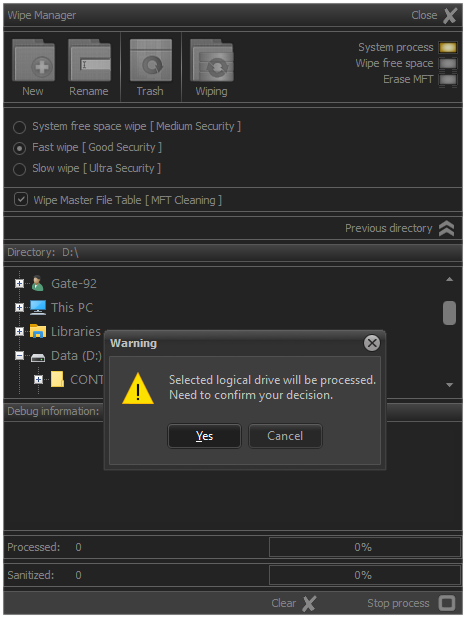
Fig.4. Warning about the start of the sanitization process.
When the sanitization process starts, the process indicator is green and the free space cleaning of logical disk execution indicator is yellow.
During the execution of the process, information will be displayed about the number of processed blocks, as well as what space of the logical disk has been sanitized.
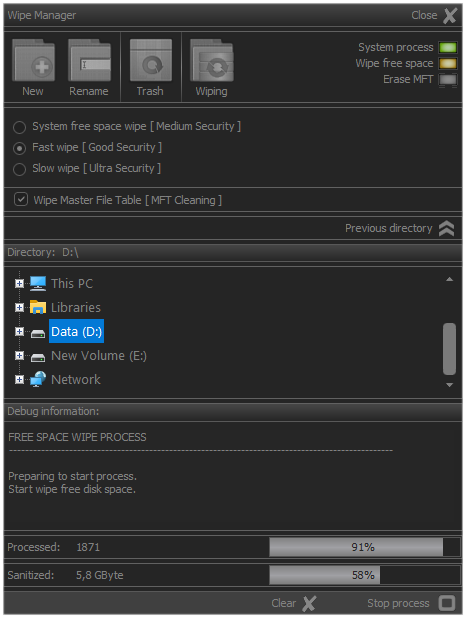
Fig.5. Warning about the start of the sanitization process.
If the MFT cleaning check box is checked, after the free disk space sanitazing process is finished, a process will be started to clean up the records in Master File Table
In this case, during the execution of the process, the number of processed records, as well as the overall status of the MFT, will be monitored.
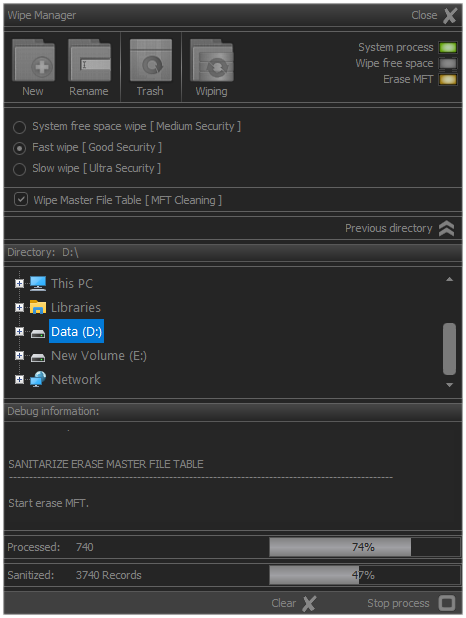
Fig.6. Wipe master file table.
When performing a systematic cleaning of the logical devices, the appearance of the module undergoes changes.
In this case, only the processing dynamics of the blocks that are subject to sanitization will be visualized.
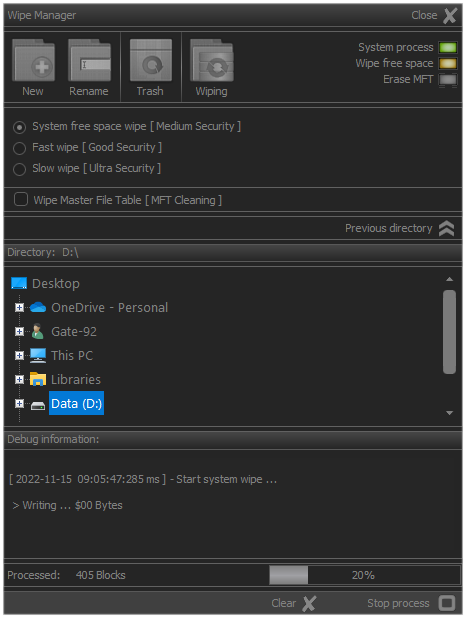
Fig.7. System cleanup of free disk space.
The remediation process can be terminated at any time if necessary. In this case, it is enough to click the Stop process button or press the Esc key.
In standard versions of the application, this action terminates the sanitization process.
In the professional versions, there is the possibility to pause the process and its subsequent continuation, as well as other options.
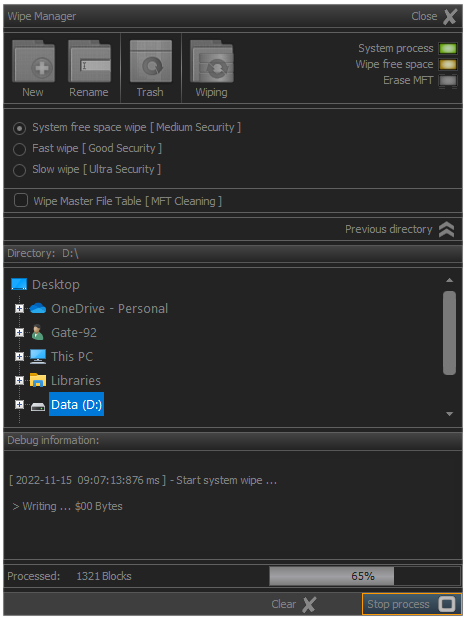
Fig.8. Terminating sanitization process.
Process termination information is recorded in the system report. This documents that the process was terminated by the user and not as a result of an error occurring.
If the process was terminated as a result of an error that led to the impossibility of its execution, this will also be reflected except in cases of hardware interruption or physical malfunction of the devices that occurred in the process of operation.
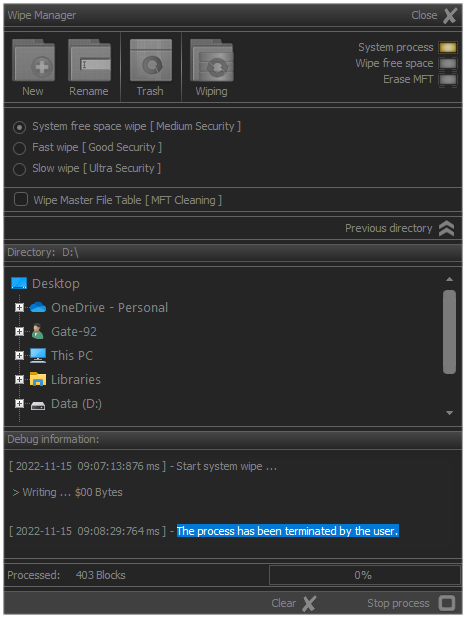
Fig.9. Information for terminating process.
Contents